Drones have become increasingly popular, offering enthusiasts and professionals alike the ability to capture stunning aerial footage and explore unique perspectives. However, like any technology, drones are susceptible to issues and malfunctions. A common problem drone owners face is motor trouble. This guide provides comprehensive steps for diagnosing and repairing drone motor issues, ensuring you can get your drone back in the air safely and efficiently.
Table of Contents
- Understanding Drone Motor Components
- Common Drone Motor Problems
- Essential Tools for Drone Motor Repair
- Troubleshooting Drone Motor Issues
- Step-by-Step Drone Motor Repair Guide
- Advanced Repair Techniques
- Maintenance Tips for Extending Motor Life
- When to Replace vs. Repair
- Cost of Drone Motor Repair
- Professional Repair Services
- Safety Precautions
Understanding Drone Motor Components
Before attempting any repairs, it’s crucial to understand the basic components of a drone motor. These typically include:
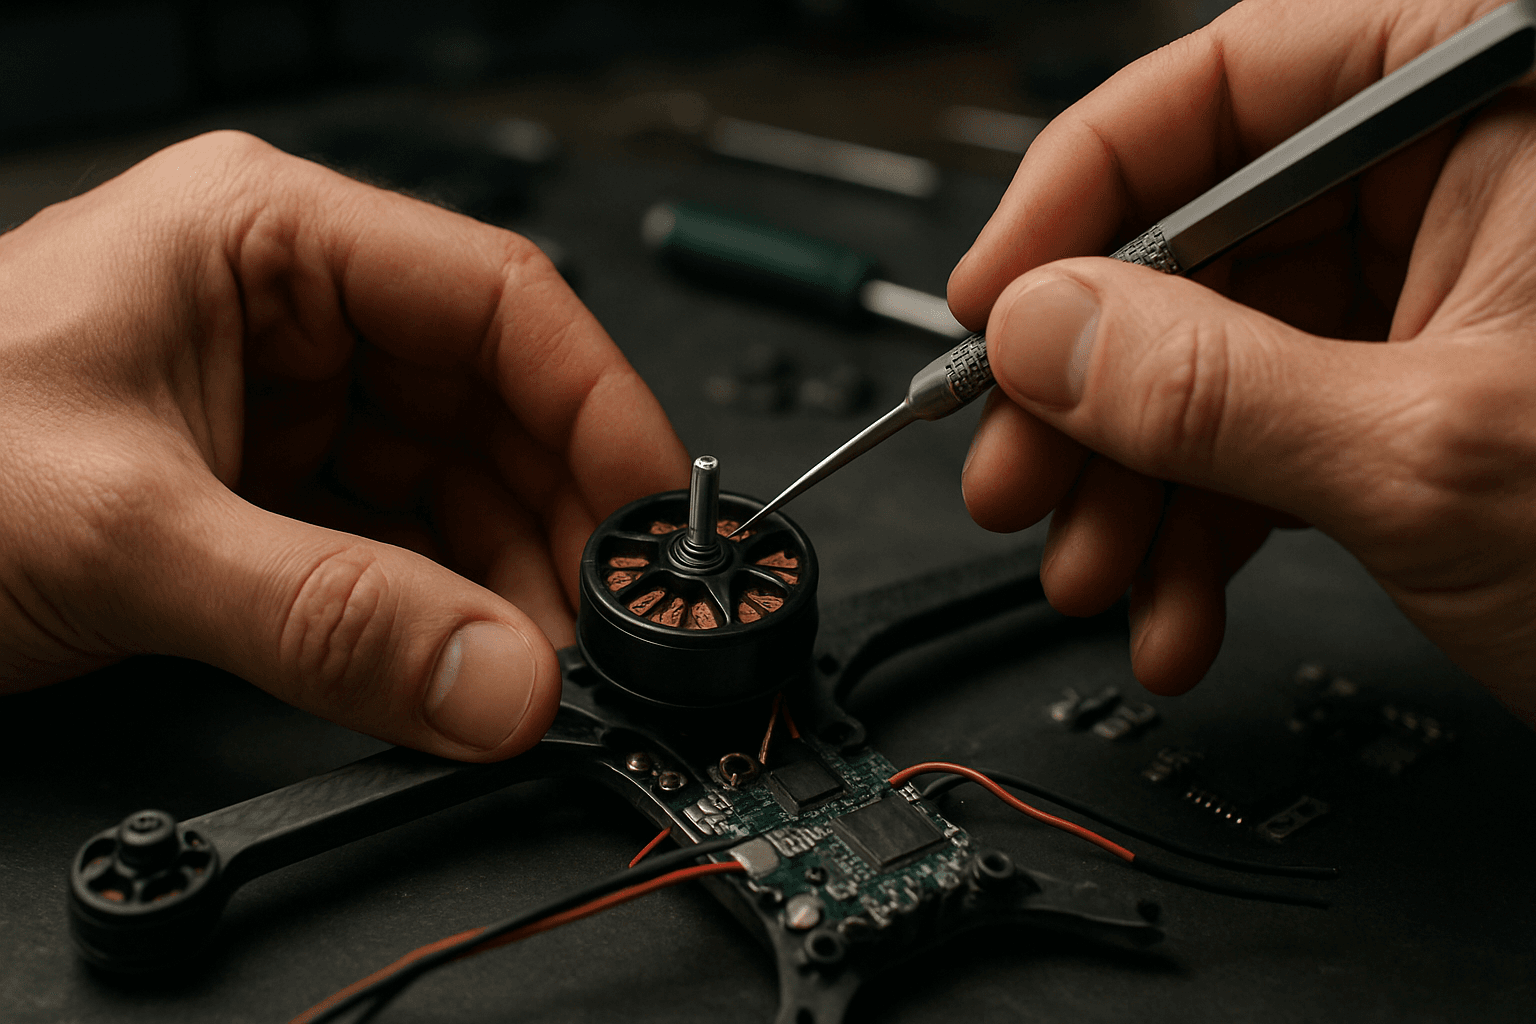
- Stator: The stationary part of the motor that contains the copper windings.
- Rotor (Motor Bell): The rotating part of the motor, housing the magnets.
- Bearings: These allow for smooth rotation of the motor shaft.
- Motor Shaft: Connects the rotor to the propeller.
- Windings: Coils of wire around the stator that create the electromagnetic field.
- Electronic Speed Controller (ESC): Regulates the power supplied to the motor.
Common Drone Motor Problems
Several issues can affect drone motor performance. Recognizing these problems early can save time and prevent further damage:
- Motor Not Spinning: The motor fails to start or respond.
- Stuttering or Erratic Spinning: The motor spins unevenly or jerks.
- Abnormal Noises: Unusual sounds like grinding, clicking, or whining.
- Overheating: The motor becomes excessively hot during or after flight.
- Reduced Performance: Uneven performance during flight.
- Physical Damage: Visible cracks, bends, or breaks.
- Loose Connections: Wires or connectors are detached or poorly connected.
- Contamination: Dirt, dust, or debris obstructing motor movement.
Essential Tools for Drone Motor Repair
Having the right tools is essential for effective drone motor repair. Here’s a list of recommended tools:
- Screwdrivers: A set of small Phillips head screwdrivers for disassembling the drone and motor.
- Multimeter: To check voltage, continuity, and diagnose electrical issues.
- Soldering Iron and Solder: For repairing or replacing wires and electronic components.
- Desoldering Tool: To remove old solder from connections.
- Wire Strippers: For preparing wires for soldering.
- Pliers: For gripping and manipulating small parts.
- Hex Key Set: To tighten or loosen motor screws.
- Bearing Oil/Lubricant: To lubricate motor bearings.
- Compressed Air: For cleaning dust and debris from the motor.
- Soft Brush: For gently removing dirt.
- Precision Knife or Cutter: For cutting wires or removing debris.
- Heat Shrink Tubing: To insulate soldered connections.
- Epoxy or Adhesive: For securing loose parts (use cautiously).
- Safety Glasses: To protect your eyes during repairs.
- Anti-Static Wrist Strap: To prevent electrostatic discharge that can damage electronic components.
- Small containers: To keep screws and small components organized.
Troubleshooting Drone Motor Issues
Before diving into the repair process, proper troubleshooting is essential. Here’s how to diagnose common motor problems:
- Visual Inspection: Check for any visible damage, loose connections, or obstructions.
- Propeller Check: Ensure propellers are not damaged, loose, or dirty. Replace if necessary.
- Manual Spin Test: Spin the motor by hand. It should spin freely with slight resistance. If it feels rough or makes noise, there may be internal damage.
- Motor Response Test: Power up the drone (without propellers) and check if all motors respond. Use the drone’s boot sequence to examine the firmware, sensors, and camera.
- Multimeter Testing:
- Voltage Check: Use a multimeter to check the voltage of the battery and the power supplied to the motor.
- Continuity Test: Check for continuity between the motor wires and the drone frame to identify any shorts.
- Sound Check: Listen for any unusual noises during motor operation.
- Temperature Check: Feel the motors after a short flight attempt. Overheating indicates a potential problem.
- ESC Check: Inspect the ESC for any signs of damage or overheating.
- Betaflight/Flight Controller Software: Use flight control debugging software to check signal output and motor control parameters.
Step-by-Step Drone Motor Repair Guide
Once you’ve identified the problem, follow these steps to repair your drone motor. Note that some repairs may require soldering or more advanced skills.
1. Disassembling the Drone:
- Power off the drone and remove the battery.
- Remove the propellers.
- Carefully open the drone’s chassis by unscrewing the appropriate screws.
- Locate the faulty motor and disconnect it from the ESC.
2. Inspecting the Motor:
- Check the motor windings for any signs of burning or damage.
- Inspect the bearings for wear or damage.
- Look for any loose magnets or debris inside the motor.
3. Cleaning the Motor:
- Use compressed air to remove any dust or debris.
- Gently clean the motor components with a soft brush.
- Remove any corrosion or rust with a specialized cleaner if necessary.
4. Replacing Motor Wires (If Needed):
- If the motor wires are cut or damaged, desolder them from the ESC.
- Solder new wires to the ESC, ensuring proper connections.
- Use heat shrink tubing to insulate the connections.
5. Replacing Bearings (If Needed):
- Disassemble the motor to access the bearings.
- Remove the old bearings using a bearing removal tool or a small punch.
- Install the new bearings, ensuring they are properly seated.
- Apply a small amount of bearing oil or lubricant.
6. Reassembling the Motor:
- Carefully reassemble the motor components.
- Ensure all screws are tightened but not over tightened.
- Reconnect the motor to the ESC.
7. Testing the Motor:
- Power on the drone (without propellers).
- Use the flight controller software (e.g., Betaflight) to test the motor.
- Check for smooth operation and any unusual noises.
Advanced Repair Techniques
For more complex issues, consider these advanced repair techniques:
- Rewinding the Motor: If the motor windings are damaged, you may need to rewind them. This involves carefully removing the old windings and replacing them with new ones, ensuring the correct number of turns and proper insulation.
- Replacing the ESC: If the ESC is faulty, it needs to be replaced. This requires soldering skills and a compatible ESC.
- Shaft Replacement: If the motor shaft is bent, it can be replaced. Disassemble the motor and press the old shaft out, then press a new one in.
Maintenance Tips for Extending Motor Life
Proper maintenance can significantly extend the life of your drone motors:
- Regular Cleaning: Keep the motors clean and free from dust and debris.
- Inspect Propellers: Regularly check propellers for damage or imbalance.
- Proper Lubrication: Lubricate the motor bearings periodically.
- Avoid Overloading: Do not overload the drone with excessive weight.
- Fly in Suitable Conditions: Avoid flying in extreme weather conditions.
- Monitor Temperature: Keep an eye on the motor temperature to prevent overheating.
- Check and Tighten Components: Ensure all screws and components are tightened properly.
- Pre-Flight Calibration: Regularly calibrate the drone to ensure stable flights.
When to Replace vs. Repair
Deciding whether to repair or replace a drone motor depends on the extent of the damage and your comfort level with repairs. Consider replacing the motor if:
- The motor is severely damaged.
- The cost of repair exceeds the cost of a new motor.
- You lack the necessary skills or tools for repair.
- The motor has reached the end of its lifespan.
Repairing the motor is a viable option if:
- The damage is minor and easily fixable.
- You have the necessary skills and tools.
- The cost of repair is significantly lower than replacement.
- You enjoy DIY projects and learning about drone mechanics.
Cost of Drone Motor Repair
The cost of drone motor repair can vary widely depending on the type of repair needed and whether you do it yourself or hire a professional.
- DIY Repair: The cost can range from $10 to $50 for parts like bearings, wires, and cleaning supplies.
- Professional Repair: Repair services can cost between $60 and $160 per motor, depending on the drone model and the extent of the damage.
- Motor Replacement: New drone motors can range from $30 to $350+, depending on the type and quality.
Professional Repair Services
If you’re not comfortable repairing the drone motor yourself, consider using a professional repair service. Many companies specialize in drone repair and offer services such as:
- Motor winding repair and replacement.
- Bearing replacement and lubrication.
- ESC repair.
- Motor balancing and calibration.
- Propeller hub and shaft repair.
Safety Precautions
When working on drone motors, always take the following safety precautions:
- Disconnect the battery before starting any repairs.
- Wear safety glasses to protect your eyes.
- Use an anti-static wrist strap to prevent damage to electronic components.
- Work in a well-lit and ventilated area.
- Be careful when using soldering irons and other hot tools.
- Dispose of old parts and batteries properly.
By following this comprehensive guide, you can effectively diagnose and repair drone motor issues, ensuring your drone stays in top condition for future flights. Regular maintenance and prompt attention to problems will not only extend the life of your drone but also ensure safer and more enjoyable flying experiences.
