The blue hour, that magical period of twilight just before sunrise and after sunset, offers a unique opportunity for photographers to capture stunning, ethereal images. When combined with the aerial perspective of a drone, the results can be truly breathtaking. This guide will provide you with the knowledge and techniques to master drone blue hour photography in the UK, covering everything from essential gear and camera settings to composition tips and legal considerations.
What is the Blue Hour?
The blue hour, also known as twilight hour, occurs twice each day – in the twilight before sunrise and after sunset. Unlike the golden hour, which is known for its warm, golden tones, the blue hour casts a cool, deep blue light over the landscape. This is because when the sun is below the horizon, only its indirect light is visible. The shorter wavelengths of blue light are scattered in the earth’s atmosphere, while the longer red wavelengths pass through space.
The blue hour doesn’t actually last for a full hour. Its duration varies depending on the time of year and weather conditions, sometimes lasting as little as 10-15 minutes or as long as 30 minutes.
Why Shoot During the Blue Hour?
- Unique Lighting: The soft, diffused blue light creates a serene and magical atmosphere, perfect for capturing dramatic landscapes and cityscapes.
- Balanced Exposure: The contrast between the sky and the foreground is less extreme than during the day, making it easier to achieve a balanced exposure.
- Enhanced Colors: The blue light complements artificial lights, creating a captivating contrast of warm and cool tones, especially in urban environments.
- Calm Conditions: Mornings and evenings often have calmer winds, making for more stable and easier drone flying.
Essential Gear for Blue Hour Drone Photography
- Drone with a Good Camera: Look for a drone with a high-resolution camera (at least 12 megapixels) and a large sensor for better low-light performance. Drones with adjustable aperture settings (like the DJI Mavic 2 Pro) offer greater control over depth of field. Good gimbal stabilization is essential for capturing sharp, blur-free images. An ideal drone for night photography should have a strong low-light performance, a stable flight system, and extended flight time.
- Extra Batteries: Cold temperatures can drain drone batteries faster, so bring extra batteries to extend your shooting time.
- ND Filters: Neutral density (ND) filters reduce the amount of light entering the camera, allowing you to use slower shutter speeds for motion blur or wider apertures for shallow depth of field.
- Polarizing Filters: Polarizing filters reduce glare and reflections, enhancing colors and contrast.
- Tripod (for Ground Shots): Although you will be capturing aerial shots with your drone, bringing a tripod can allow you to capture ground-based shots to supplement your aerial photography.
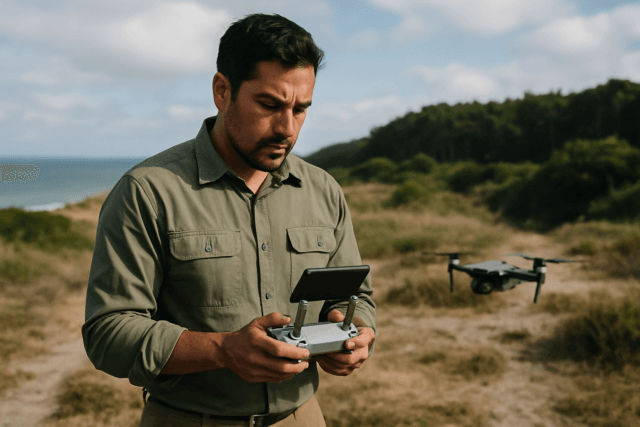
- Remote Controller with a Screen: This allows you to see what your drone sees and adjust camera settings in real time.
- Drone Lights: Equipping your drone with lights will help you maintain visual line of sight.
- Memory Cards: Ensure you have sufficient storage for all your high-resolution images.
- Camera Bag: A reliable camera bag to transport and protect your equipment.
- Mobile Device: Use a smartphone or tablet with drone control apps and photography planning tools.
Best Drone Camera Settings for Blue Hour
Mastering your drone’s camera settings is crucial for capturing stunning blue hour images. Here are some recommended settings:
- Shooting Mode: Use manual mode to have full control over your camera settings.
- Image Format: Always shoot in RAW format to retain maximum image data for post-processing.
- ISO: Set the ISO as low as possible (usually ISO 100) to minimize noise and maximize image quality.
- Aperture: Adjust the aperture based on the desired depth of field. For landscapes, use a narrower aperture (f/5.6 – f/8) to keep more of the scene in focus. In low light, open up the aperture (f/2.8 – f/4) to allow more light to enter the camera.
- Shutter Speed: Use a slower shutter speed to capture more light and create motion blur (e.g., of car headlights). Experiment with different shutter speeds to achieve the desired effect.
- White Balance: For blue hour, I recommend changing the white balance yourselves, as the camera in the drone will often get it completely wrong.
- Exposure Bracketing: Use exposure bracketing to capture a range of exposures and combine them in post-processing for a high dynamic range (HDR) image.
Composition Tips for Drone Blue Hour Photography
- Rule of Thirds: Divide your frame into nine equal segments and place key elements along these lines or at their intersections.
- Leading Lines: Use natural or artificial lines to guide the viewer’s eye through the image.
- Symmetry: Capture symmetrical scenes for a balanced and visually appealing composition.
- Foreground Elements: Include interesting foreground elements to add depth and scale to your images.
- Look in all Directions: Facing away from the point of sunset by 90 degrees or more will produce better results. Often the light is a nicer blue, and the landscape will take on an appealing blue and pink tint.
- Vertical Format: Turn your camera and take some in vertical format as. Just make sure you pay attention to light sources and don’t be afraid to take some test shots to make sure your settings are correct.
Drone Flying Best Practices
- Location Scouting: Scout your location for optimal angles and compositions before sunset. Failing to scout locations ahead of time or not considering potential obstacles can lead to suboptimal shots or even dangerous flying conditions.
- Pre-Flight Checklist: Use pre-flight checklists, and be prepared to adjust on the fly as lighting conditions change.
- Multiple Shots: To maximize the chances of having a sharp image in these low shutter speeds, a trick I have found that works really well for me is to use “multiple,” to three or even five when windy.
- Smooth Moves: Adjust the output of the drone control stick (sensitivity) on the controller and the gimbal’s yaw smoothness and rotation speed as well as pitch speed and smoothness.
- Avoid Automatic Modes: Avoid any automatic modes, that’s if you want to improve.
UK Drone Laws and Regulations for Night Flying
It is crucial to understand and comply with UK drone laws and regulations before flying at night. Here’s a summary of the key points:
- Visual Line of Sight (VLOS): You must maintain VLOS with your drone at all times during the flight.
- Lighting: Equip your drone with appropriate lighting to ensure visibility in darkness. Anti-collision lights visible from three statute miles away are mandatory for night operations.
- Maximum Altitude: The maximum altitude for drone flights in the UK is 400 feet (120 meters).
- No-Fly Zones: Be aware of and avoid flying in restricted airspace, such as near airports, airfields, prisons, and nuclear facilities. Use tools like NoFlyDrones.co.uk to check for no-fly zones in your area.
- Registration and Training: If your drone weighs 250g or more, you must register with the Civil Aviation Authority (CAA) and pass an online test to get a flyer ID. You must also register for an operator ID if you’re responsible for the drone.
- The Drone Code: Follow the Drone Code, which provides guidance on safe and responsible drone flying. The code’s main safety tips are in a mnemonic, spelling drone:
- Don’t fly near airports or airfields.
- Remember to stay below 120m (400ft) and at least 50m (150ft) away from people.
- Observe your drone at all times.
- Never fly near aircraft.
- Enjoy responsibly.
Post-Processing Tips for Blue Hour Drone Photos
Post-processing is essential for bringing out the best in your blue hour drone photos. Here are some tips for editing your images:
- Color Correction: Adjust the white balance to enhance the cool tones of the blue hour.
- Exposure Adjustment: Fine-tune the exposure to achieve the desired brightness and contrast.
- Highlight and Shadow Recovery: Recover details in the highlights and shadows to create a more balanced image.
- Contrast Adjustment: Add contrast to enhance the details and textures in the scene.
- Sharpening: Sharpen the image to enhance the details and make it look crisper.
- Noise Reduction: Reduce noise, especially in low-light images, to improve image quality.
Popular UK Locations for Blue Hour Drone Photography
- London: Capture iconic landmarks such as Tower Bridge, the Houses of Parliament, and the London Eye against the backdrop of the blue hour sky.
- Edinburgh: Photograph the Edinburgh Castle and the Old Town from above, with the city lights twinkling below.
- Salford Quays: A stunning view of Salford Quays taken at Blue Hour.
- Lake District: Capture the tranquil beauty of the lakes and mountains during the blue hour.
- Coastal Areas: Photograph the dramatic coastlines of Cornwall, Wales, or Scotland as the sky transitions from day to night.
Final Thoughts
Drone blue hour photography in the UK offers a unique opportunity to capture stunning and evocative images. By understanding the principles of blue hour photography, mastering your drone’s camera settings, and complying with UK drone laws, you can create breathtaking aerial photographs that showcase the beauty of the UK landscape in a whole new light. Remember to prioritize safety, respect the environment, and have fun exploring the creative possibilities of drone photography.
