Drones have opened up exciting new possibilities for photographers, allowing us to capture breathtaking aerial perspectives previously only accessible by helicopters or airplanes. However, simply having a drone doesn’t guarantee stunning photos. Mastering composition techniques is crucial to transforming ordinary aerial shots into extraordinary works of art. This guide explores essential drone composition techniques to help you capture compelling and visually appealing images from above.
Why Composition Matters in Drone Photography
Composition is the art of arranging elements within a frame to create a visually appealing and impactful image. In drone photography, good composition is even more critical because the unique aerial perspective can sometimes flatten the scene, making it challenging to create depth and interest. By applying effective composition techniques, you can guide the viewer’s eye, create a sense of depth, and tell a compelling story.
Essential Drone Composition Techniques
Here are some essential drone composition techniques to elevate your aerial photography:
1. The Rule of Thirds
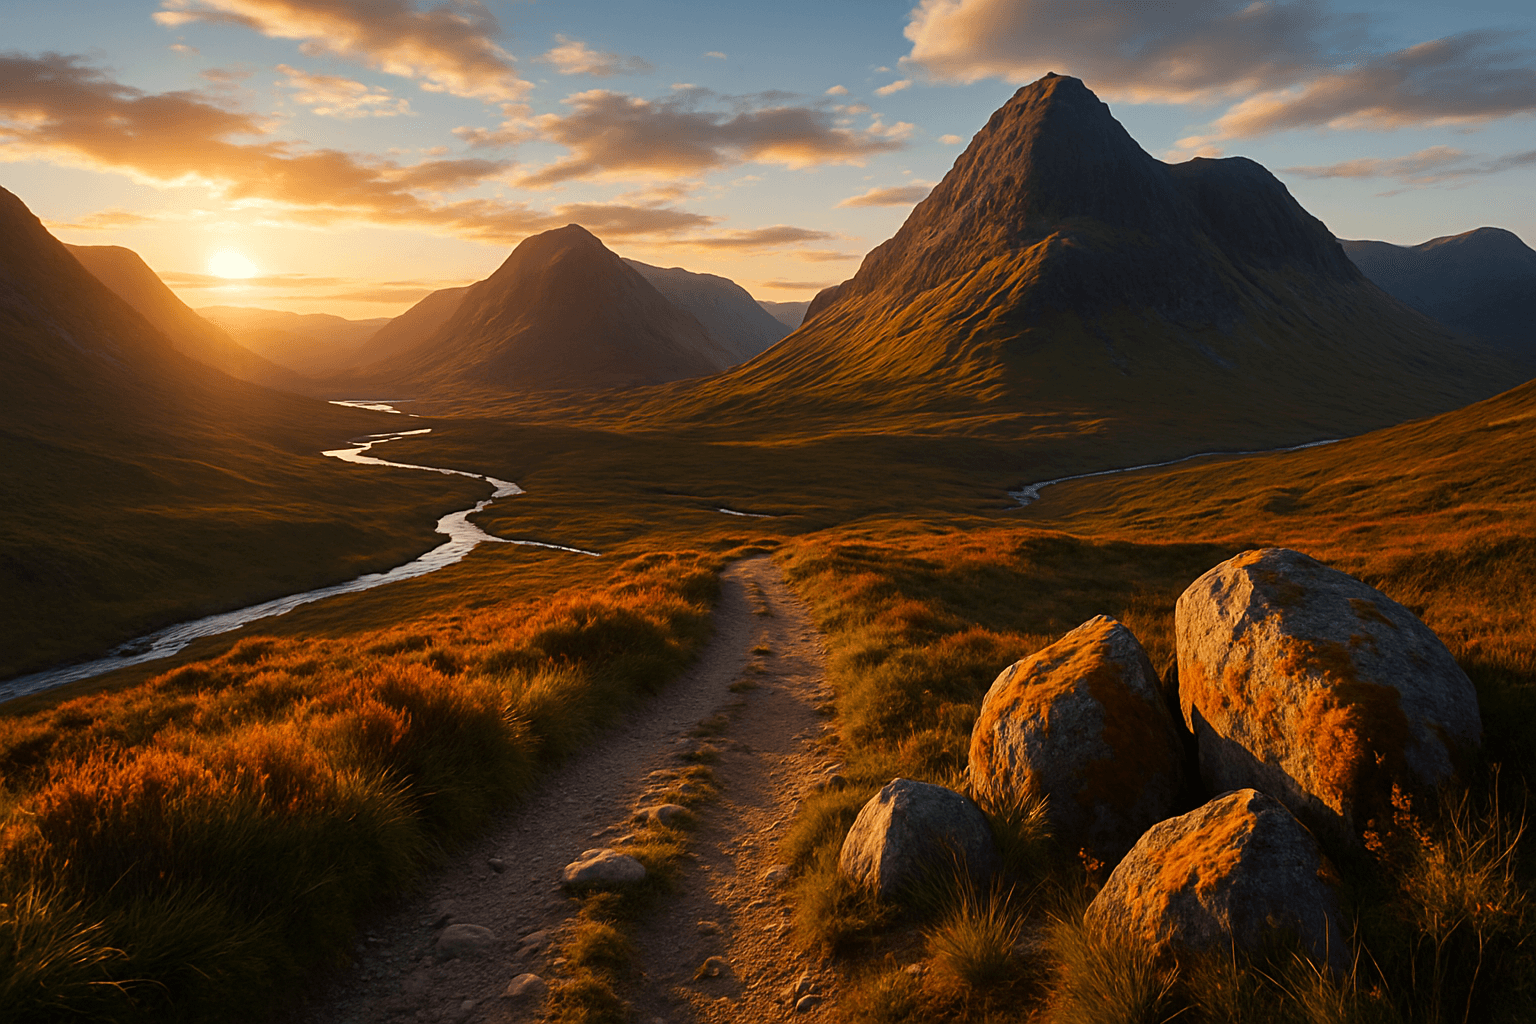
The rule of thirds is a fundamental principle in photography that involves dividing the frame into nine equal parts using two horizontal and two vertical lines. Instead of placing the main subject in the center, position it along these lines or at their intersections. This creates a more balanced and visually appealing composition, drawing the viewer’s eye naturally through the image.
- Application: Imagine a 3×3 grid overlaid on your drone’s camera view. Place key elements like the horizon, a prominent building, or a natural feature at the intersection of these lines. For example, when shooting a landscape, position the horizon along the top or bottom third of the frame instead of directly in the middle.
2. Leading Lines
Leading lines are lines within the frame that guide the viewer’s eye towards the main subject or a specific point of interest. They can be straight, curved, diagonal, or even implied by a series of objects.
- Application: Look for natural or man-made lines in the landscape, such as roads, rivers, fences, or railway tracks. Position these lines to lead the viewer’s eye towards the subject, creating a sense of depth and movement.
3. Symmetry and Patterns
Aerial photography provides a unique perspective to capture striking symmetrical compositions and mesmerizing patterns. Symmetry can be found in reflections, architectural designs, or even natural formations like rows of crops. Patterns can be created by repeating lines, shapes, colors, or textures.
- Application: Position your drone directly above a symmetrical subject, such as a building with a reflection in water, and adjust the altitude until the composition feels balanced. Look for patterns in fields, forests, or urban landscapes and experiment with different angles to emphasize their repetition and rhythm.
4. Framing
Framing involves using elements within the scene to create a frame around the main subject, drawing attention to it and adding depth to the image. Frames can be natural, such as trees, arches, or rock formations, or man-made, such as bridges or buildings.
- Application: Experiment with flying your drone lower to capture foreground elements that frame the background. Position your subject within the frame, using the surrounding elements to create a sense of depth and context.
5. Scale and Perspective
Drones allow you to play with scale and perspective in unique ways. By varying your altitude, you can compress distances, emphasize patterns, or create a sense of vastness. Including recognizable objects or people in the frame can help to convey the scale of the scene.
- Application: Fly your drone higher for grand overviews that compress distances and reveal patterns in the landscape. Fly lower for more intimate scenes that showcase foreground elements against epic backgrounds. Include a person or object in the frame to provide a sense of scale and perspective.
6. Depth with Color and Contrast
Aerial photos can sometimes lack intimacy and connection. Use color and contrast to create depth and draw the viewer into the scene. Look for areas with contrasting colors or textures, or shoot during the golden hours (early morning and late afternoon) when the light is soft and warm, creating long shadows that add depth and dimension.
- Application: Identify areas with contrasting colors, such as a green field next to a red barn, and use these elements to create a sense of depth. Shoot during the golden hours to capture soft, warm light and long shadows that enhance the three-dimensionality of the scene.
7. Simplification
Sometimes, less is more. Simplifying the composition by removing distracting elements can help to focus the viewer’s attention on the main subject. Look for clean lines, minimal clutter, and strong shapes that create a sense of order and clarity.
- Application: Identify and eliminate distracting elements from the frame, such as unnecessary objects or empty space. Focus on the essential elements of the scene and arrange them in a way that is simple, balanced, and visually appealing.
8. Subject Placement
The placement of the subject within the frame can significantly impact the overall composition. Experiment with different positions, such as off-center, near the edge, or even filling the entire frame, to see what works best for the scene.
- Application: Place your subject off-center according to the rule of thirds, perhaps at the convergence of natural leading lines, and balance the composition with interesting background elements. Avoid placing the horizon line directly through the middle of the frame, which can appear static.
9. Diagonals
Diagonal lines add movement, depth, tension, and dynamism to images. Unlike horizontal and vertical lines that create a static feel, diagonal lines guide the viewer’s eye through the frame and create a sense of direction. They create the illusion of depth, especially when converging towards a vanishing point, adding a three-dimensional quality to an otherwise flat scene.
- Application


