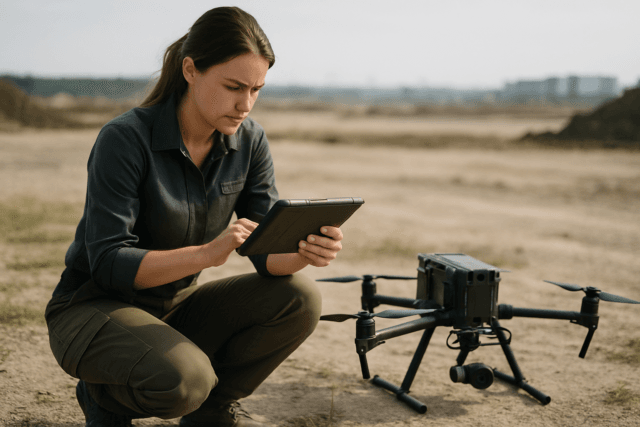
Achieving a specific depth of field (DoF) in aerial drone footage can elevate your videography from simple aerial shots to truly cinematic masterpieces. Depth of field refers to the distance between the nearest and farthest objects in a scene that appear acceptably sharp in an image. Manipulating it allows you to draw the viewer’s eye, create a sense of scale, or isolate your subject, adding a professional polish to your drone productions.
While drone cameras inherently face unique challenges due to their distance from subjects, understanding the core principles and applying specific techniques can unlock a new level of creative control in your aerial cinematography.
Understanding Depth of Field in Drone Photography
Depth of field is a fundamental concept in photography and videography. Simply put, it’s the range of distances within your shot where objects appear in sharp focus. A “shallow” depth of field means only a small portion of your scene is in focus, with the foreground and background blurred (often creating a desirable “bokeh” effect). A “deep” depth of field, conversely, keeps most of the scene, from near to far, in sharp focus.
For drone pilots, achieving pronounced shallow depth of field can be particularly challenging because drones often capture subjects from a greater distance, making it more difficult to create significant separation between foreground and background elements.
Key Factors Influencing Depth of Field
Several interconnected factors determine the depth of field in your drone footage. Mastering these will give you the control needed to achieve your desired aesthetic:
Aperture (f-stop)
The aperture is the opening in the lens that controls the amount of light reaching the camera sensor. It’s arguably the most direct way to control DoF.
- Wider Aperture (lower f-number like f/1.8, f/2.8): A wider opening (smaller f-stop number) lets in more light and creates a shallower depth of field, blurring the background more significantly. This is ideal for isolating subjects.
- Narrower Aperture (higher f-number like f/8, f/11): A narrower opening (larger f-stop number) lets in less light and results in a deeper depth of field, keeping more of the scene in focus. This is typically used for landscapes where you want everything sharp.
Many professional and prosumer drones, such as the DJI Mavic series (Mavic 2 Pro, Mavic 3 Classic, Mavic 4 Pro) and Autel EVO Lite+, offer adjustable apertures. Entry-level drones often have fixed apertures, which can limit creative control over DoF.
Focal Length
The focal length of your lens also significantly impacts depth of field.
- Longer Focal Lengths (Telephoto Lenses): These lenses magnify the subject and compress perspective, inherently producing a shallower depth of field, even at the same aperture. This is why portrait photographers often favor longer lenses.
- Shorter Focal Lengths (Wide-Angle Lenses): These lenses capture a broader field of view and tend to have a deeper depth of field, making them suitable for expansive landscapes where maximum sharpness is desired.
Some advanced drones, like the DJI Mavic 3 Pro, feature multiple cameras with varying focal lengths, offering greater versatility for DoF control.
Distance to Subject
The distance between your drone’s camera and the subject you are focusing on is a crucial factor.
- Closer Distance: The closer your drone is to the subject, the shallower the depth of field will be. This helps isolate the subject from its surroundings.
- Farther Distance: As your drone moves farther from the subject, the depth of field increases, bringing more of the scene into focus. This is a common challenge with drones, as maintaining a safe distance often results in a deeper DoF.
Sensor Size
While less directly controllable than aperture or focal length, sensor size plays an indirect role in depth of field.
- Larger Sensors: Generally, cameras with larger sensors can achieve a shallower depth of field more easily than those with smaller sensors when other factors like focal length and field of view are matched. This is often because larger sensors typically use longer focal lengths to achieve the same field of view, and longer focal lengths reduce DoF.
- Smaller Sensors: Drones with smaller sensors often have a deeper depth of field by default.
Techniques for Capturing Specific Depth of Field Effects
1. Achieving Shallow Depth of Field (Cinematic Look)
To make your subject pop and create a blurred background, aim for a shallow depth of field.
- Wider Aperture (Lower f-number): Use the widest aperture available on your drone (e.g., f/2.8, f/4). Remember that a smaller f-stop means a larger aperture.
- Get Closer to Your Subject: Fly your drone as close to your subject as safely and legally possible. The proximity will naturally narrow the DoF.
- Longer Focal Length: If your drone has a zoom lens or multiple cameras with different focal lengths (e.g., a telephoto lens), use a longer focal length to compress the background and enhance blur.
- Subject-to-Background Separation: Ensure there is a significant distance between your subject and its background. The greater the separation, the more pronounced the blur will be.
- ND Filters: In bright conditions, a wide aperture can lead to overexposure. Neutral Density (ND) filters act like sunglasses for your camera, reducing the amount of light entering the lens without affecting color. This allows you to use a wider aperture for shallow DoF while maintaining correct exposure and cinematic shutter speeds (e.g., 1/50th or 1/60th for 24fps or 30fps video, respectively, following the 180-degree rule).
2. Capturing Deep Depth of Field (Landscape Focus)
For sweeping vistas where you want everything sharp, from foreground elements to distant mountains, a deep depth of field is essential.
- Narrower Aperture (Higher f-number): Use a smaller aperture (e.g., f/8, f/11, or higher) to keep a wider range of the scene in focus.
- Maintain Distance: Flying higher and farther from your main points of interest will naturally increase the depth of field.
- Shorter Focal Length: Utilize wider-angle lenses to maximize the depth of field.
- Focus at the Hyperfocal Distance: For ultimate sharpness across a landscape, consider focusing at the hyperfocal distance, which is the closest distance at which a lens can be focused while keeping objects at infinity acceptably sharp. Apps and calculators can help determine this for your specific drone and settings.
Essential Drone Camera Settings for DoF Control
To effectively control depth of field, you’ll need to shoot in manual or aperture priority mode.
- Aperture (f-stop): As discussed, this is your primary control for DoF. Adjust it according to your desired effect (low f-number for shallow, high f-number for deep).
- Shutter Speed: After setting your aperture, adjust the shutter speed to achieve proper exposure. For cinematic video, aim for a shutter speed that is roughly double your frame rate (e.g., 1/50 or 1/60 for 24fps or 30fps) to ensure natural motion blur. If your aperture is wide and it’s very bright, you’ll need ND filters to achieve this slower shutter speed without overexposing.
- ISO: Keep your ISO as low as possible (typically ISO 100) to minimize noise and maintain image quality. Only increase ISO if necessary to achieve correct exposure, especially in low light conditions.
- Focus Mode: Ensure your drone is set to manual focus or spot focus on your intended subject, rather than autofocusing on an unintended element. Some drones, like the DJI Spark, even had dedicated “Shallow Focus” modes, though these often rely on computational photography to simulate the effect.
Equipment Considerations
- Drones with Adjustable Aperture: Drones like the DJI Mavic Pro series (Mavic 2 Pro, Mavic 3 Classic, Mavic 4 Pro) and Autel EVO Lite+ offer adjustable apertures, which are critical for direct DoF control.
- ND Filters: A set of Neutral Density (ND) filters is indispensable. They allow you to use wider apertures and slower shutter speeds in bright daylight, which is crucial for achieving shallow DoF and cinematic motion blur. Common strengths include ND4, ND8, ND16, ND32, and ND64.
- Drones with Larger Sensors: Drones with larger camera sensors (e.g., 1-inch or Four Thirds sensors) will generally offer more flexibility in achieving shallower depth of field compared to those with smaller sensors.
Post-Production Techniques
When in-camera shallow DoF is difficult to achieve, post-production can offer solutions, though often less organically.
- Depth Map Generation: Software like DaVinci Resolve (with its “Depth Map” effect) or After Effects plugins (e.g., Depth Scanner) can analyze your footage to create a depth map, which then allows you to apply artificial blur to the background. This works by intelligently identifying what’s closer and farther from the camera.
- Manual Masking and Blurring: For static shots or shots with minimal movement, you can manually mask your subject and apply a blur effect to the background in video editing software. This is more labor-intensive but offers precise control.
Best Practices and Common Pitfalls
- Practice is Key: Experiment with your drone’s settings in various lighting conditions and distances to understand how they affect depth of field.
- Prioritize Safety: Never compromise flight safety or legal regulations to get a specific shot. Maintain safe distances from subjects and obstacles.
- Monitor Exposure: When adjusting aperture for DoF, always monitor your exposure to avoid overexposed or underexposed footage. Use ND filters as needed.
- Check Focus in Flight: If your drone has focus peaking or a magnified view, use it to ensure your subject is tack sharp before recording.
- Avoid Excessive Post-Blur: While post-production blur can be useful, it can sometimes look artificial, especially around complex edges or with significant subject movement. Aim to get as much in-camera as possible.
By thoughtfully considering aperture, focal length, subject distance, and utilizing tools like ND filters, drone pilots can move beyond simply capturing footage to crafting visually compelling aerial narratives with precise control over depth of field.
