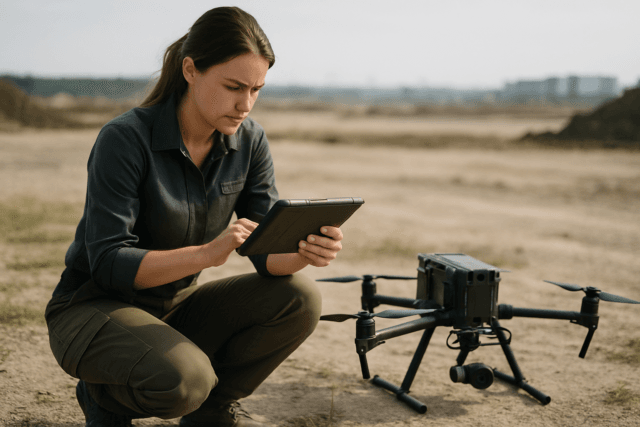
The ethereal glide of a drone capturing breathtaking landscapes or dynamic action is inherently captivating. Elevating this visual spectacle further, cinematic slow-motion drone footage transforms ordinary scenes into mesmerizing works of art, emphasizing details and creating a dramatic, engaging experience. But achieving this buttery-smooth, high-impact look isn’t just about slowing down a clip; it’s a meticulous process that begins long before post-production and culminates with sophisticated editing techniques.
Laying the Groundwork: Pre-Production and In-Flight Best Practices
The quality of your slow-motion effect in post-production is heavily dependent on the footage you capture. Thoughtful planning and precise in-flight execution are paramount.
Master Your Frame Rate for Smoothness
The foundation of excellent slow motion is a high frame rate (FPS). When you slow down footage, you’re essentially stretching out the captured frames over a longer period. More frames per second provide more data, resulting in smoother playback without choppiness or artifacts.
- Standard Playback: Most cinematic projects are edited and played back at 24 or 30 frames per second (fps).
- For Slow Motion: To achieve a 2x slow-down, shoot at 60fps. For a 4x slow-down, aim for 120fps. Many modern drones, like DJI’s Mavic or Phantom series, support these higher frame rates. Some drones can even record 1080p footage at 240fps for extreme slow-motion effects. If your drone offers 4K at 60fps or even 100/120fps, these settings will provide higher quality for slowing down.
Optimize Camera Settings for Clarity
Beyond frame rate, other camera settings significantly impact the final cinematic quality.
- Shutter Speed (180-Degree Rule): For natural-looking motion blur, set your shutter speed to approximately double your frame rate. For example, if you’re shooting at 60fps, your shutter speed should be around 1/120th of a second. This “180-degree rule” helps avoid a “staccato” or overly sharp look.
- ISO: Keep your ISO as low as possible (ideally ISO 100) to minimize digital noise and graininess, especially critical when slowing down footage where imperfections become more apparent.
- White Balance: Set your white balance manually to ensure consistent color temperature throughout your shots, often around 5500 Kelvin for natural daylight tones.
- Color Profile (Flat/Log): Shoot in a flat color profile like D-Log, D-Log M, or a similar neutral profile if your drone offers it. This preserves the maximum amount of color information, providing greater flexibility for color grading in post-production.
Employ ND Filters for Proper Exposure
Neutral Density (ND) filters are crucial for maintaining the 180-degree shutter rule, especially in bright conditions. They reduce the amount of light entering the camera lens without affecting color, allowing you to use slower shutter speeds (double your frame rate) without overexposing the footage.
Ensure Stability and Plan Your Flight Paths
Smooth, stable footage is fundamental for cinematic slow motion.
- Gimbal Stability: Ensure your drone’s gimbal is properly calibrated and functioning to counteract vibrations and jerky movements.
- Weather Conditions: Fly in calm weather to avoid wind-induced shakiness.
- Smooth Movements: Practice slow, deliberate drone movements. Avoid sudden accelerations, stops, or changes in direction. Gradual pans, reveals, and tracking shots translate best to slow motion. Plan your shots in advance, envisioning how they will look slowed down.
The Post-Production Powerhouse: Software and Techniques
Once your high-quality footage is captured, post-production is where the magic truly happens, transforming raw clips into polished cinematic slow motion.
Choosing the Right Editing Software
Several professional and accessible video editing software options offer robust slow-motion capabilities:
- Adobe Premiere Pro: An industry standard with advanced speed controls, time remapping, and optical flow.
- DaVinci Resolve: A powerful tool, with an excellent free version, known for its superior color grading and comprehensive speed adjustment features like retime controls and retime curves.
- Final Cut Pro: Ideal for Mac users, offering strong slow-motion tools and ease of use.
- Wondershare Filmora: Features user-friendly speed controls and speed ramping presets.
- Other Options: GoPro Studio (for action camera footage), VSDC (lightweight for Windows), and even dedicated tools like Topaz Video AI for advanced slow-motion interpolation.
Interpreting Footage for Initial Slow-Down
When you import high-frame-rate footage into your editing software, it may initially play back at its native speed (e.g., a 120fps clip playing in a 30fps timeline will appear slowed down by 4x automatically if interpreted correctly). However, sometimes drones output high-frame-rate footage that plays back at a standard rate (e.g., a 120fps clip playing at 30fps, meaning the duration is stretched).
To ensure correct interpretation:
- Right-click on your clip in the project panel.
- Select Modify > Interpret Footage (or similar option depending on software).
- Choose to “Assume this frame rate” and enter the desired project frame rate (e.g., 23.976 or 24fps if your source was 60fps or 120fps). This tells the software how many frames to display per second, effectively slowing down the clip while maintaining its original frames.
Advanced Slow-Motion Techniques (Time Interpolation)
When slowing down footage beyond its native frame rate (e.g., a 30fps clip slowed to 50%), gaps are created between frames. Editing software uses time interpolation methods to fill these gaps.
- Frame Sampling (Default): This is the most basic method, where the software duplicates existing frames to fill in the gaps. It often results in choppy or jittery footage, particularly when slowed down significantly.
- Frame Blending: This technique takes two adjacent frames and blends them together with a cross-dissolve to fill the gaps. It provides a smoother slow-motion effect than frame sampling but can sometimes create a “ghosting” or blurry image, especially with fast-moving subjects.
- Optical Flow: Considered the most advanced method, optical flow analyzes the movement of pixels between frames to generate entirely new, intermediate frames. This often produces the smoothest and most natural-looking slow motion, even with footage that wasn’t shot at extremely high frame rates.
- Limitations: Optical flow is computationally intensive and can sometimes produce “digital artifacts” or “warping” if the footage has very complex or fast-moving subjects, intricate textures, or low contrast. It performs best with smooth, stable footage and clear subjects.
- Application: In Adobe Premiere Pro or Final Cut Pro, you can apply Optical Flow by right-clicking the clip, going to “Speed/Duration” or “Retime Control,” and selecting “Optical Flow” under “Time Interpolation” or “Video Quality.”
Speed Ramping for Dynamic Effects
Speed ramping involves dynamically changing the speed of a clip within different sections, transitioning from real-time to slow motion and back. This technique can add significant drama and impact. Most editing software allows you to create keyframes on the speed or retime curve of a clip, enabling precise control over speed changes.
Polishing for Cinematic Perfection
Once your slow motion is technically sound, several artistic touches will elevate it to truly cinematic status.
Color Grading for Mood and Consistency
Color grading is crucial for setting the tone and enhancing the visual appeal of your drone footage. Use tools in your editing software (like DaVinci Resolve or Adobe Premiere Pro) to adjust exposure, contrast, saturation, and color balance. Employing LUTS (Look-Up Tables) can quickly apply a professional cinematic look, which can then be fine-tuned.
Stabilizing and Refining Footage
Even with careful flying, minor jitters can sometimes occur. Most editing software includes stabilization tools (e.g., Warp Stabilizer in Premiere Pro) that can smooth out subtle camera movements, further enhancing the slow-motion effect.
The Role of Sound and Music
Carefully selected music and sound design can dramatically enhance the emotional impact of your slow-motion sequences. Matching the rhythm and mood of the music to the visual flow is key to a cinematic experience.
Avoid Overuse and Maintain Purpose
While visually stunning, slow motion should be used judiciously. Overusing it can dilute its impact. Employ slow motion to highlight crucial moments, emphasize beauty, or build dramatic tension. Each slow-motion segment should serve a clear narrative or aesthetic purpose.
Achieving cinematic slow-motion drone footage is a blend of meticulous planning, skilled piloting, and sophisticated post-production. By adhering to high frame rates, optimizing camera settings, leveraging advanced software techniques like optical flow, and applying cinematic finishing touches, you can transform your aerial videography into truly breathtaking and memorable content.
